Creating a Glass of Juice in Maya…
Creating a truly photorealistic asset in any 3d package is a skill that requires a lot of attention to detail. It’s not just about understanding the physical properties of an object , but how to model the object in a way that allows the renderer to translate the data into pixels that convince us of its existence. Most of the time, our 3d models should exactly replicate real life, but sometimes, achieving photorealistic results means bending the rules a little. A glass of liquid is a really good example here, and prompts one to highlight how a renderer such as Arnold, deals with the scenario, and favours a particular workflow.
Modelling the Glass & Liquid…
When modelling something such as a glass and liquid, there will come a stage when one needs to make a decision about placement of the liquid in accordance with the glass. The norm here might be to think that, because in real life, liquid touches the glass that we should do the same in our own approach, however this will lead to undesirable consequences. The logical next step might be to think that if this causes rendering artefacts, that one should scale down the liquid ever so slightly, however this would also not look accurate.
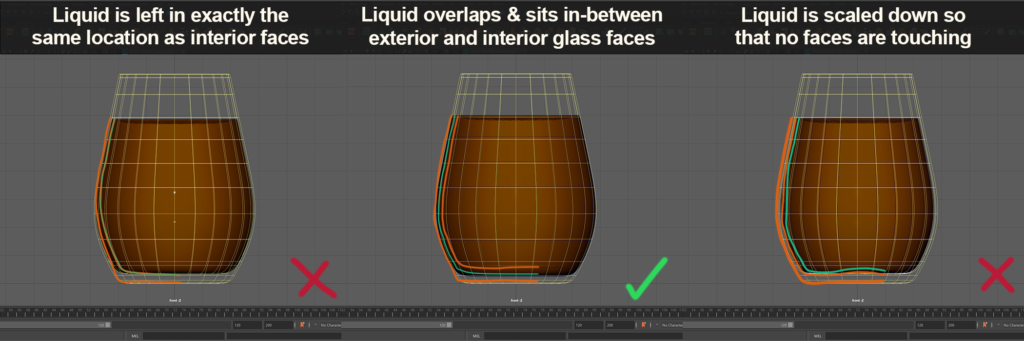
According to the Arnold Documentation, one should overlap the liquid so it sits between the inner and outer skin of the glass. Though not technically accurate, I have found this to look physically accurate when rendered, as the documentation suggests.
Bake in the Subdivision before the UVs…
Before we start to unwrap, I prefer to convert my smooth preview mesh (3 on keyboard) to polygons. This reassures us that the mesh we are working on doesn’t change after the uv map is applied, and is important for ensuring our textures don’t move or distort.
- I like to use mesh > smooth here and change the amount of divisions using the options Box. (If you have already UV mapped at this stage, you can try playing around with UV boundary smooth options to minimise texture disruption)
- If displacement is to be used, I’d recommend spending a bit of time before this step, ensuring that the main bulk of polygons are square, and not very rectangular or triangular.
For exclusive downloads || Assets | Scene Files | Cheat Sheets and much more
Subscribe to our Newsletter
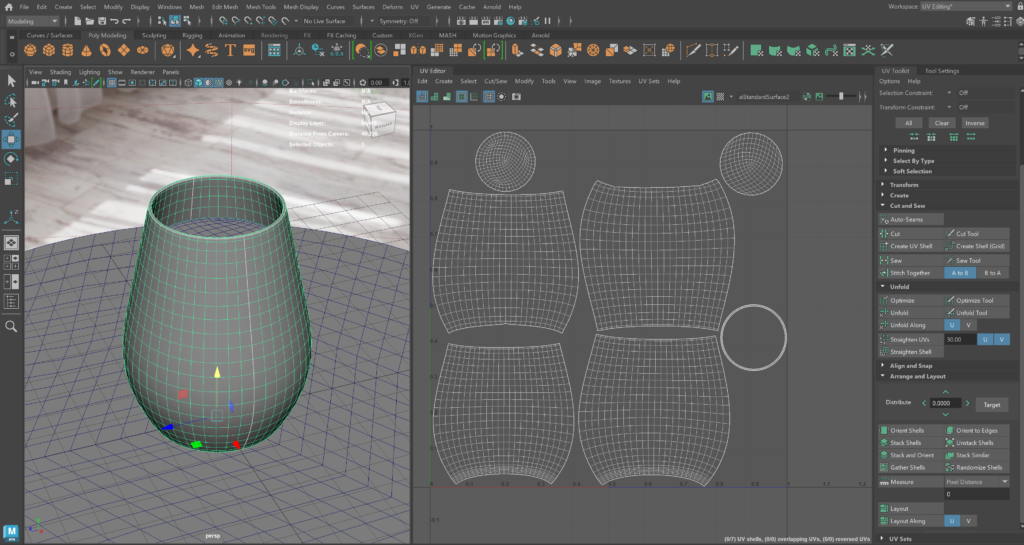
UV Unwrap
To ensure that the materials and any textures used are correctly wrapped around the object, we need to ensure that we create some uvs for it. Maya has come a long way with its tools for UV mapping, and allows us to be a bit more fussy with which tools we use. I like to start by projecting from the camera to give one UV shell, and then cut up and unfold the shells as I see fit.
- If one needs to preview a texture on the surface whilst UV unwrapping, one can select the checkerboard icon in the uv editor to the left of the material name.
Lighting before materials…
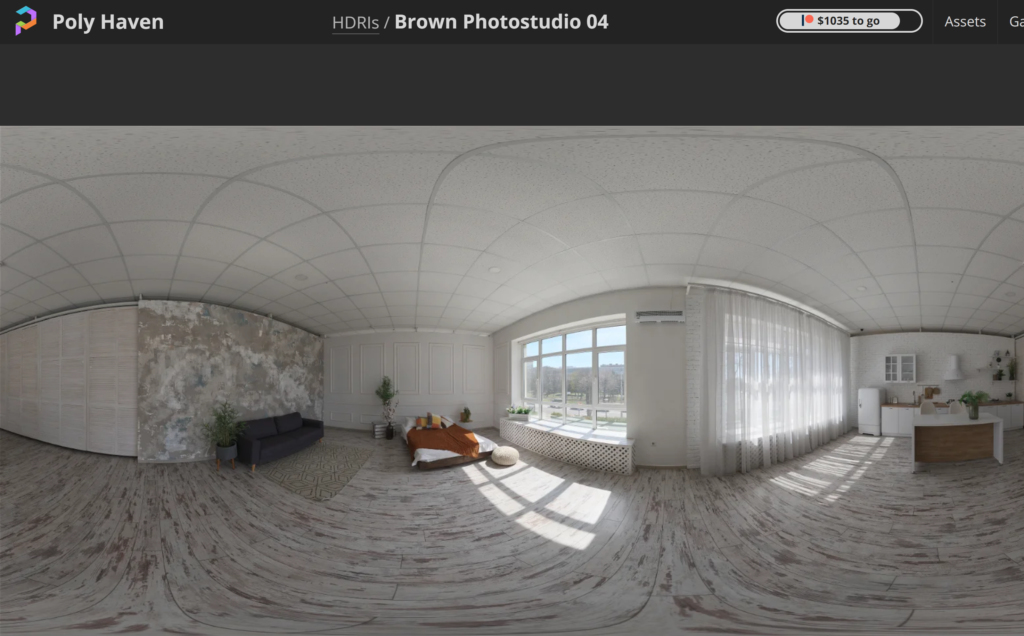
To ensure that your materials are looking as you wish, it is important to firstly set your scene with lights. I’d highly recommend using white lights when you are working through the look of your object. This is to ensure that you are balancing your colours to white, as opposed to a tint of another colour. In this example, we will use a HDRI from the amazing creators over at Polyhaven. We don’t need to get super scientific with the white balance, but just look for one that has an overall white tone, and is not moving towards any other colours too much.

Shading the Glass…
When shading a glass in Arnold there are quite a few factors at play but luckily we have a starting point through the presets button in the attribute editor. If you are building from scratch, you should ensure to disable the base colour weight, add in transmission and apply the correct Index of Refraction (List of Refractive Indices). The default for a standard glass is 1.52.
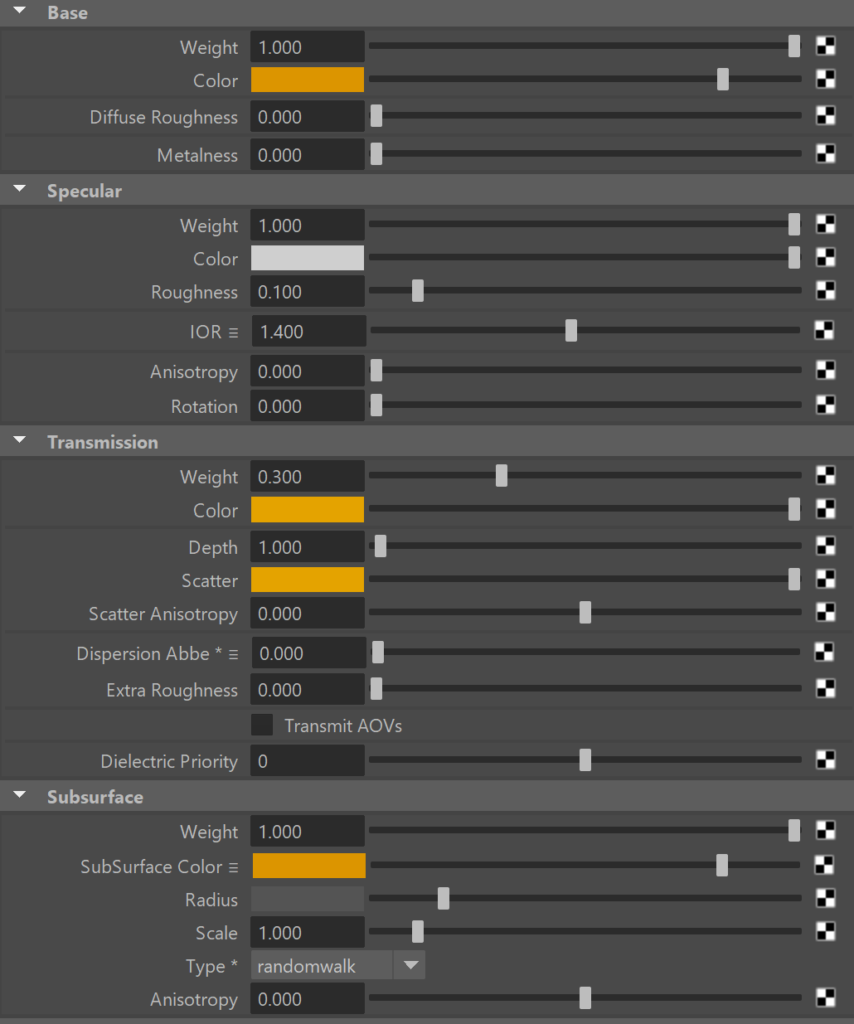
Shading the Orange Juice…
The juice is a little more complicated, and I really would recommend starting with the preset here. You can see the channels that have been enabled in the figure here on the right. Notable properties here are;
- Partially enabling the transmission weight (0.3), allows the base colour value still to be used.
- Transmission depth allows for the liquid to appear thick or thin. Larger numbers appear more thinly.
- Sub surface scattering is also enabled and given the same sub-surface colour as transmission colour, scatter and base colour.
Camera…
To help push the render even further, we could try using a different focal length than Maya’s default 35mm Lens. For this example I used a 125mm. I have 2 main thoughts running through my head when I select a lens;
- Do I want any depth of field?
- How much of the environment do I want to see?
Depth of field is a lovely looking effect but it will add a considerable amount of time on to the render, and your AA samples will also need to be higher than the default. Higher numbers in the focal length field will decrease the field of view (width), and start to flatten the perspective too. Higher numbers will give nice results for close up shots and are usually used a lot in product photography.
- To help with finding out the focus distance, you can enable object details in the display > heads up display drop down, and select your object looking through your camera.

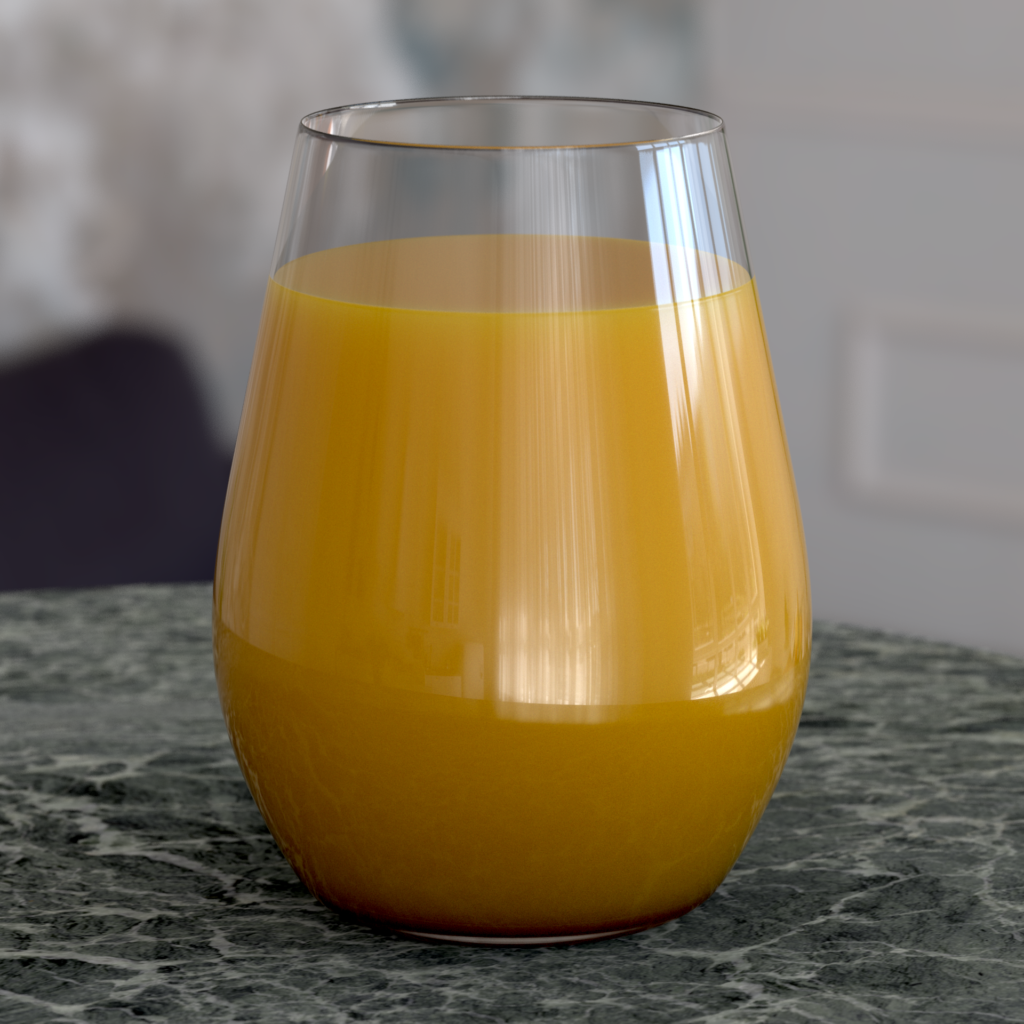
After applying a material to a makeshift work surface and using all of the above settings you should arrive at something that looks like this…
If you have found this article valuable in any way, please support us and help us grow by signing up for our monthly Newsletter >>Here<< where you will gain exclusive access to all past & future Anella Community Assets, we think you will find useful for your own projects. Alternatively you can head over to Anella’s YouTube channel, subscribe, like and leave us a comment.
Keep your eyes peeled for our article on how to add a bit of dirt and imperfection.
For exclusive downloads || Assets | Scene Files | Cheat Sheets and much more